As you remember, in iOS 7 Apple introduced the topLayoutGuide and bottomLayoutGuide properties in UIViewController to describe a screen area that isn’t covered by any content (status bar, navigation bar, toolbar, tab bar, etc.) In iOS 11 Apple has deprecated these properties and introduced the safe area. Apple suggests that we do not to place any controls outside safe areahence in iOS 11 you have to use new safe area API when you position views in iOS application.
When we started supporting iPhone X resolution and the safe area in our apps we found that many classes in UIKit have the new safe area features. The goal of this article is to summarise and describe them.
Agenda
This article is divided into the following parts:
- UIView
- UIViewController
- UIScrollView
- UITableView
- UICollectionView
These are all classes that have new safe area properties and methods.
Example
You can play with the example in our GitHub repository while reading this article.
UIView
In iOS 11 the UIViewController topLayoutGuide and the bottomLayoutGuideproperties have been replaced by the new safe area properties in UIView:
The safeAreaInsets property means that screen can be covered from all sides not only at the top and the bottom. When the iPhone X was presented it become clear why we would need the left and right insets.
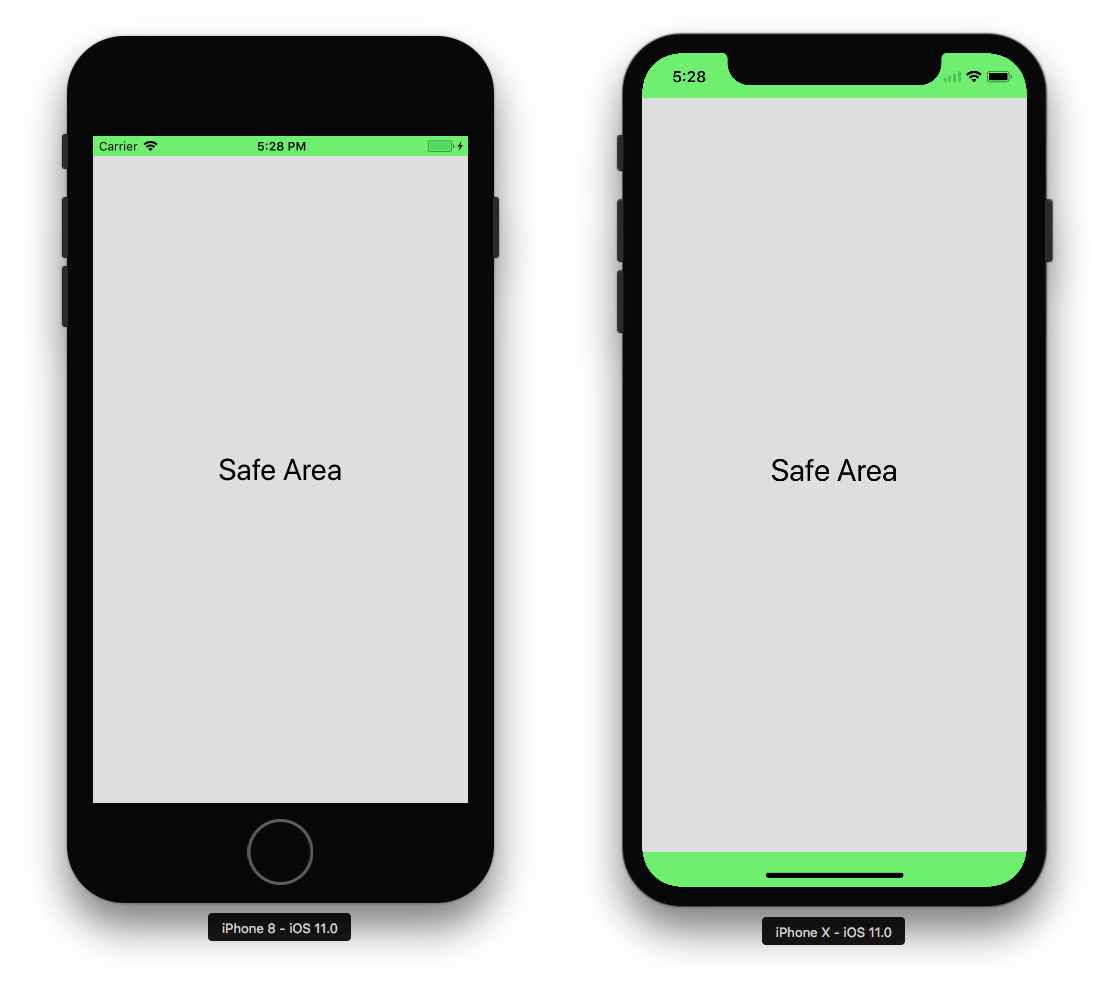
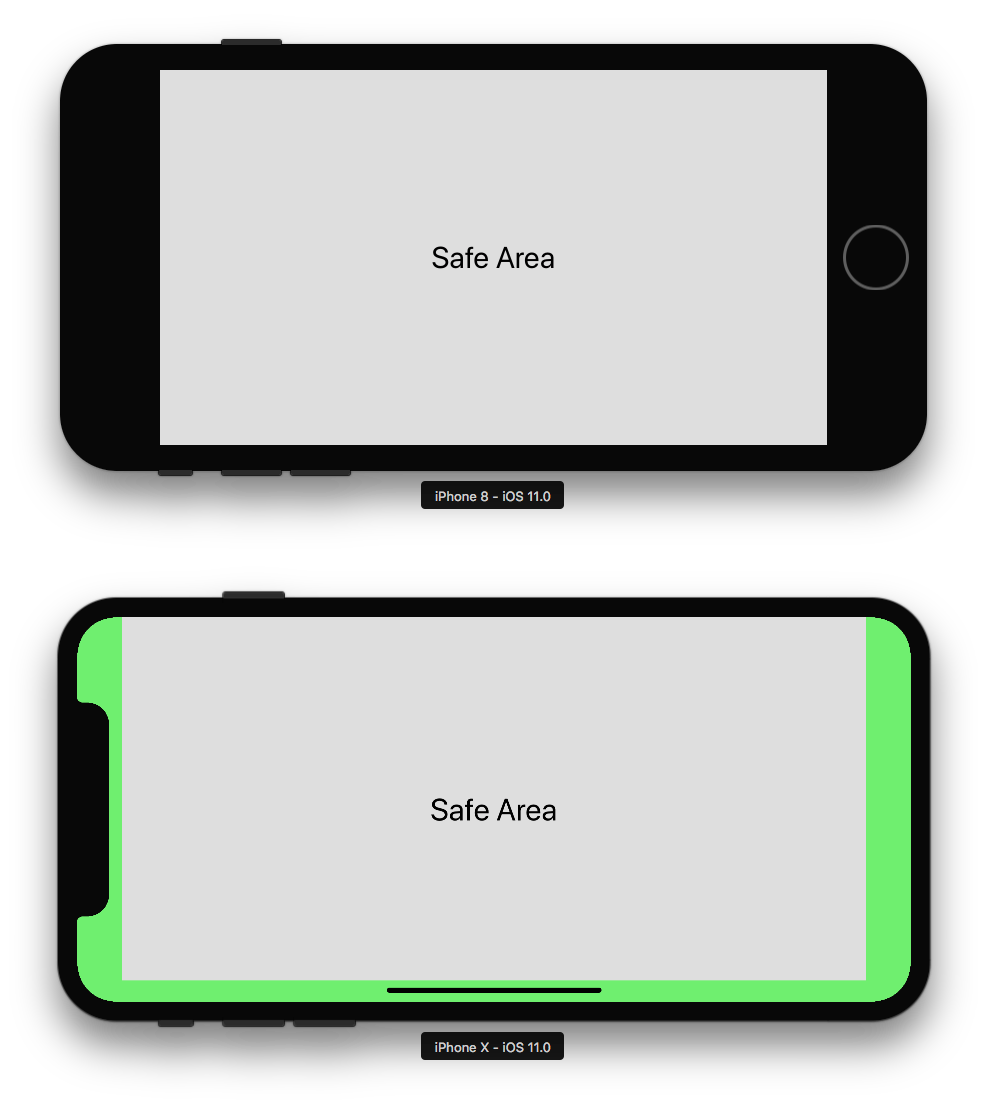
The iPhone X has the top and the bottom safe area insets in portrait orientation. Left, right and bottom insets in landscape orientation.
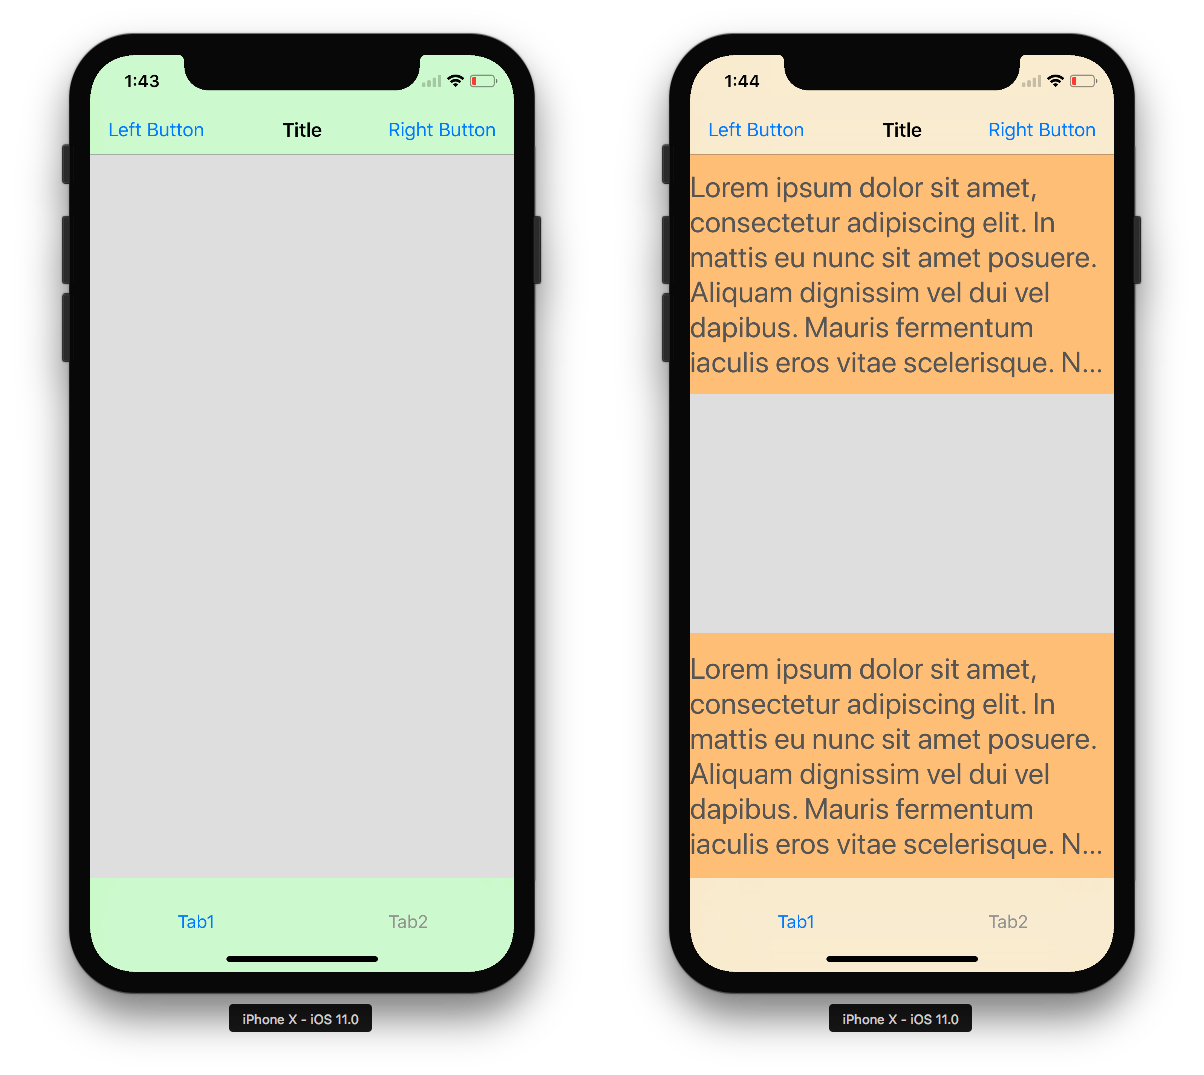
Let’s look at an example. Two custom subviews with a text label and a fixed height are added to the top and the bottom of a view controller’s view and are attached to the view’s edges.
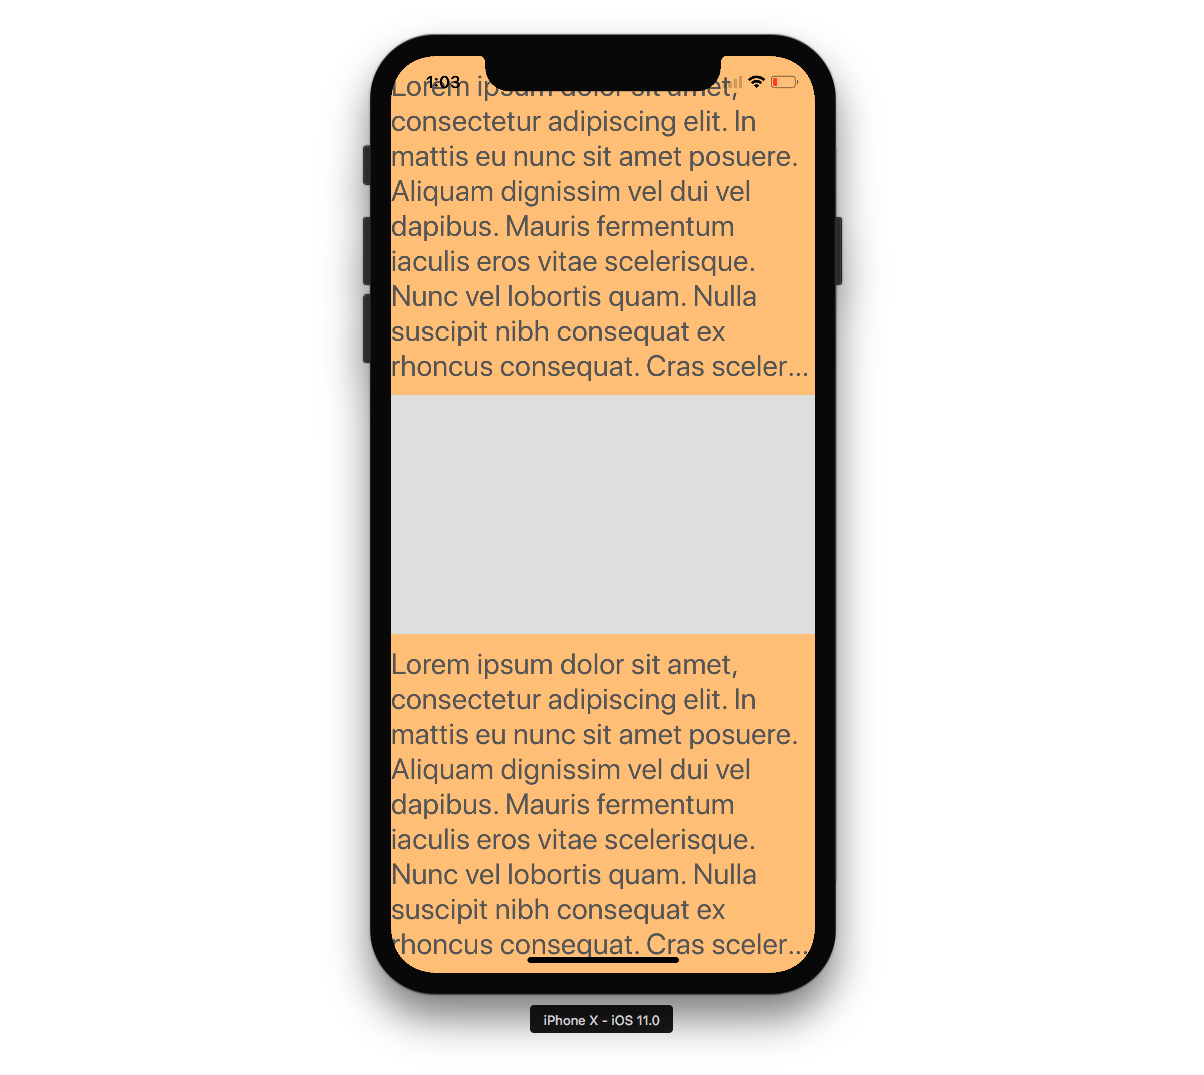
As you can see the subviews content is overlapped by the notch at the top and a home indicator at the bottom. To correctly position the subviews we can attach them to the safe area using manual layout:
or using auto layout:
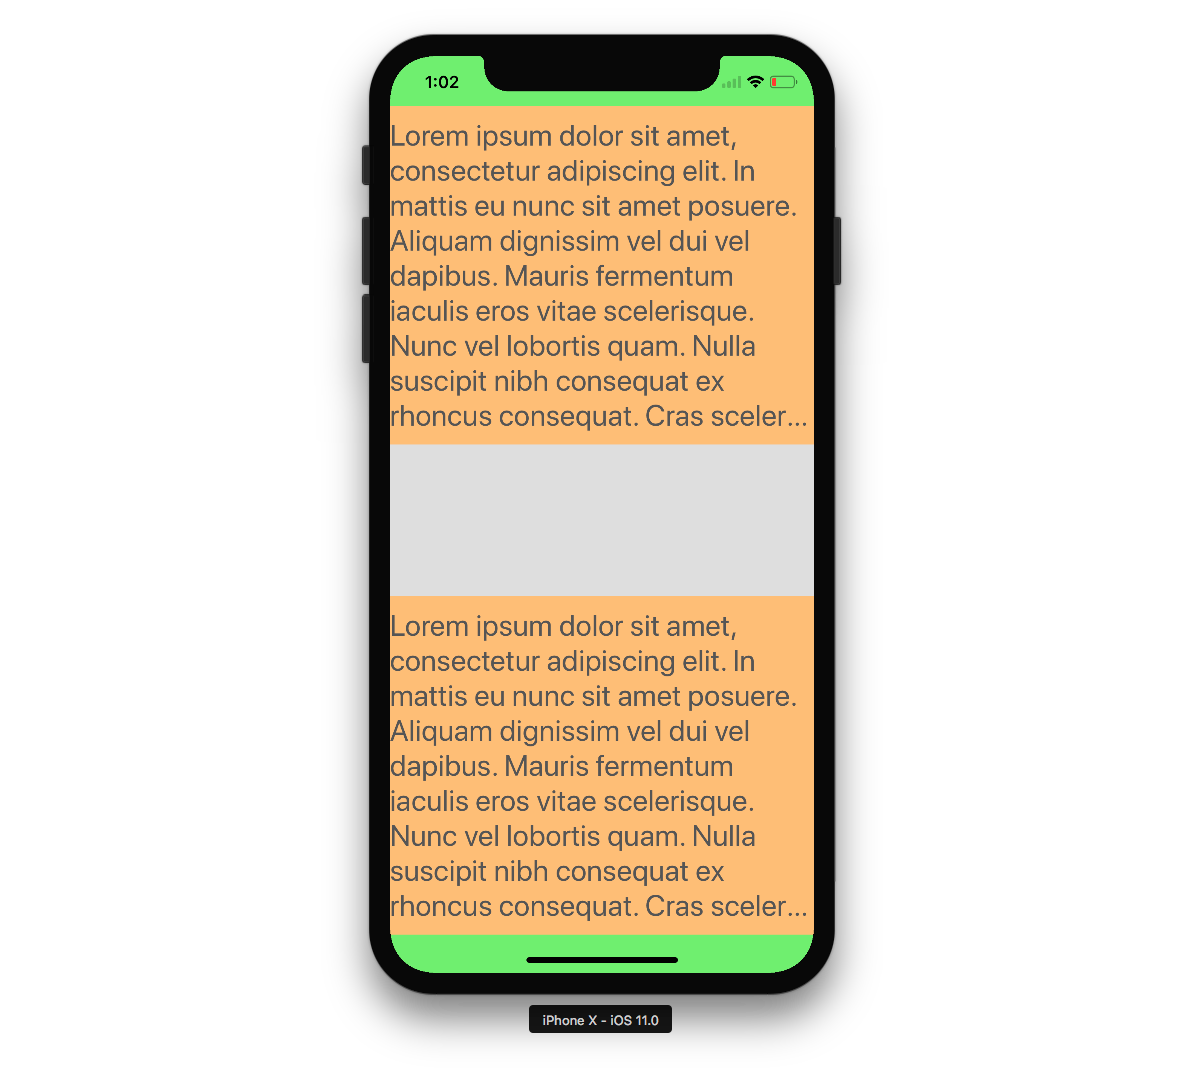
Looks better. Furthermore you can attach the subviews content the to safe area insets directly in a subview subclass ☝️:
Or:

It’s cool that now you can attach views to the safe area not only in a view controller but anywhere in the subviews hierarchy.
UIViewController
In iOS 11 UIViewController has a new property:
It is used when the view controller subviews cover the embedded child view controller views. For example Apple uses additional safe area insets in UINavigationController and UITabBarController when the bars are translucent.
It works great but a strange thing happens when the status bar is hidden 😬
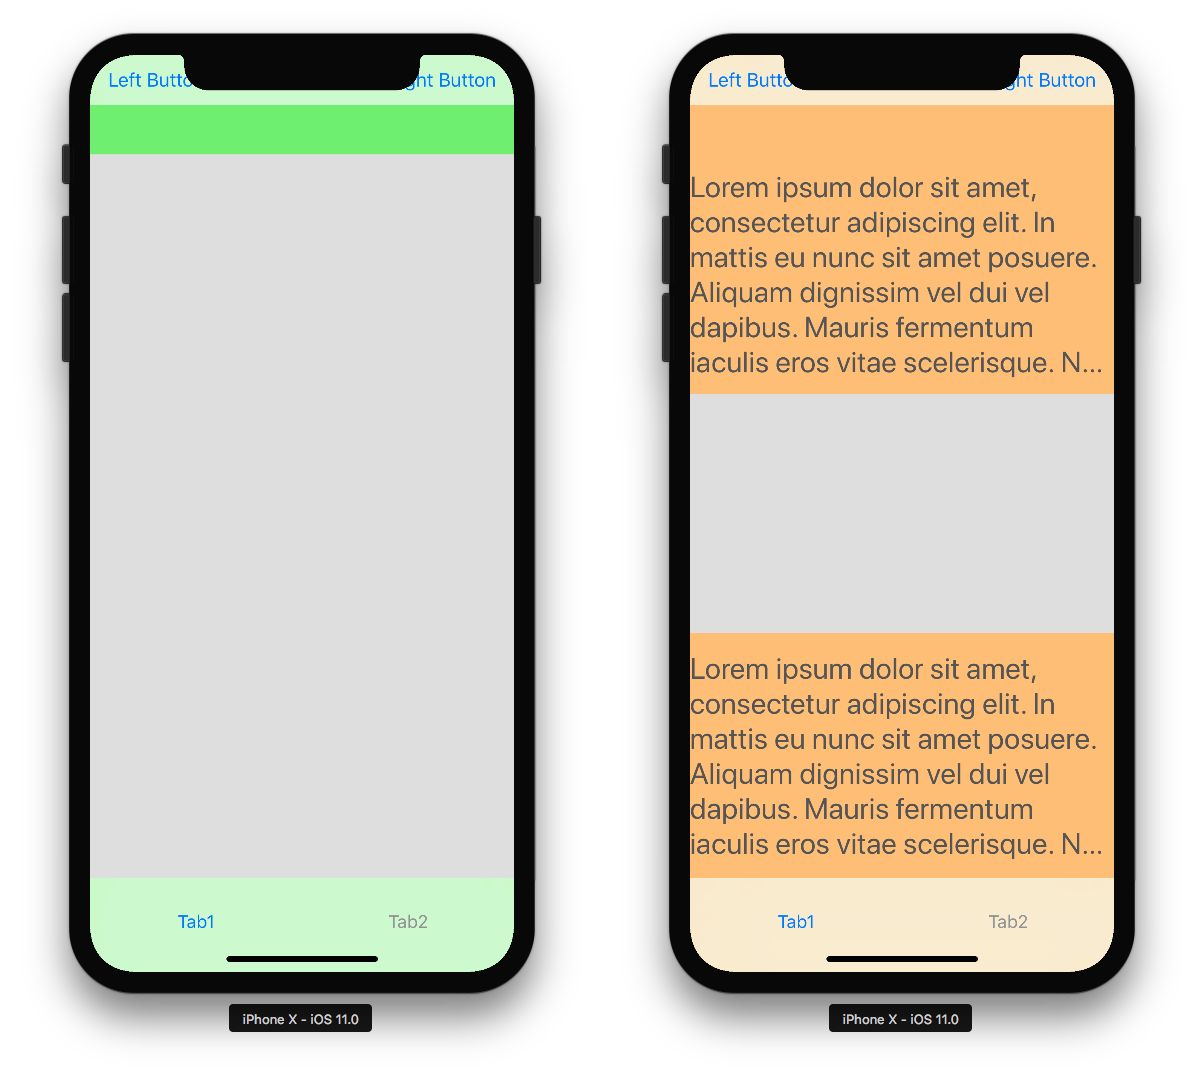
All safe area insets are calculated properly but the navigation bar is moved to the top under the notch. A really sad bug and as I know there are no ways to fix it for now excepting some workarounds.
When you change the additional safe area insets or safe area insets are changed by the system, the appropriate methods in UIView and UIViewController are called
Simulate iPhone X safe area
Additional safe area insets also can be used to test how your app supports iPhone X. It can be useful if you can’t test your app on the simulator and don’t have an iPhone X 😩.

UIScrollView
Let’s add a scroll view with a text label to the view controller and attach it to the view’s edges.

As you can see the scroll view insets are automatically adjusted at the top and at the bottom. In iOS 7 and higher scroll view content insets adjustment behavior can be managed using UIViewController’s automaticallyAdjustsScrollViewInsets property but in iOS 11 it’s deprecated and replaced by a new UIScrollView’s contentInsetAdjustmentBehaviorproperty:
Content Insets Adjustment Behavior
never — scroll view content insets are never adjusted. It’s simple.

scrollableAxes — content insets are adjusted only for scrollable axes. For example the vertical axis is scrollable when the scroll view content size height is greater than the frame size height or when the alwaysBounceVertical property is enabled. Similarly the horizontal axis is scrollable when the content size width is greater than the frame size width or when the alwaysBounceHorizontal property is enabled.
In landscape orientation only the bottom content inset is adjusted. The left and right content insets aren’t adjusted because the horizontal axis is not scrollable.
always — scroll view content insets are adjusted for all scrollable and not scrollable axes
automatic — default and the most interesting value. It’s identical to always when the following conditions are true:
- the scroll view horizontal axis is scrollable, the vertical axis is not scrollable
- a scroll view is the first subview of a view controller’s view
- a view controller is the child of a navigation or tab bar controller
- automaticallyAdjustsScrollViewInsets enabled
In all other cases automatic is identical to scrollableAxes.
Additional description for automatic behavior can be found in the UIScrollView class:
Similar to .scrollableAxes, but for backward compatibility will also adjust the top & bottom contentInset when the scroll view is owned by a view controller with automaticallyAdjustsScrollViewInsets = YES inside a navigation controller, regardless of whether the scroll view is scrollable
Apple documentation has a slightly different description:
Content is always adjusted vertically when the scroll view is the content view of a view controller that is currently displayed by a navigation or tab bar controller. If the scroll view is horizontally scrollable, the horizontal content offset is also adjusted when there are nonzero safe area insets.
Thus automatic behavior is default because of backward compatibility — scroll views with the horizontal scrollable axis will have the same top and bottom insets in iOS 10 and iOS 11.
Adjusted Content Insets
In iOS 11 UIScrollView has new adjustedContentInset property:
What is the difference between contentInset and adjustedContentInset? Let’s print both values when a scroll view is covered by a navigation bar at the top and a tab bar at the bottom:
Now if we add 10 points to contentInset from all sides and print both values again:
we’ll see that in iOS 11 the actual scroll view content insets can be read from the adjustedContentInset property but not from the contentInset property. It means that when your application supports both iOS 10 and iOS 11 a different logic for the adjustment of content insets should be created.
If you change contentInset or content insets are adjusted by the system, the appropriate methods in UIScrollView and UIScrollViewDelegate are called
UITableView
Let’s add a table view with custom header and custom cells to the view controller and attach it to the view’s edges.
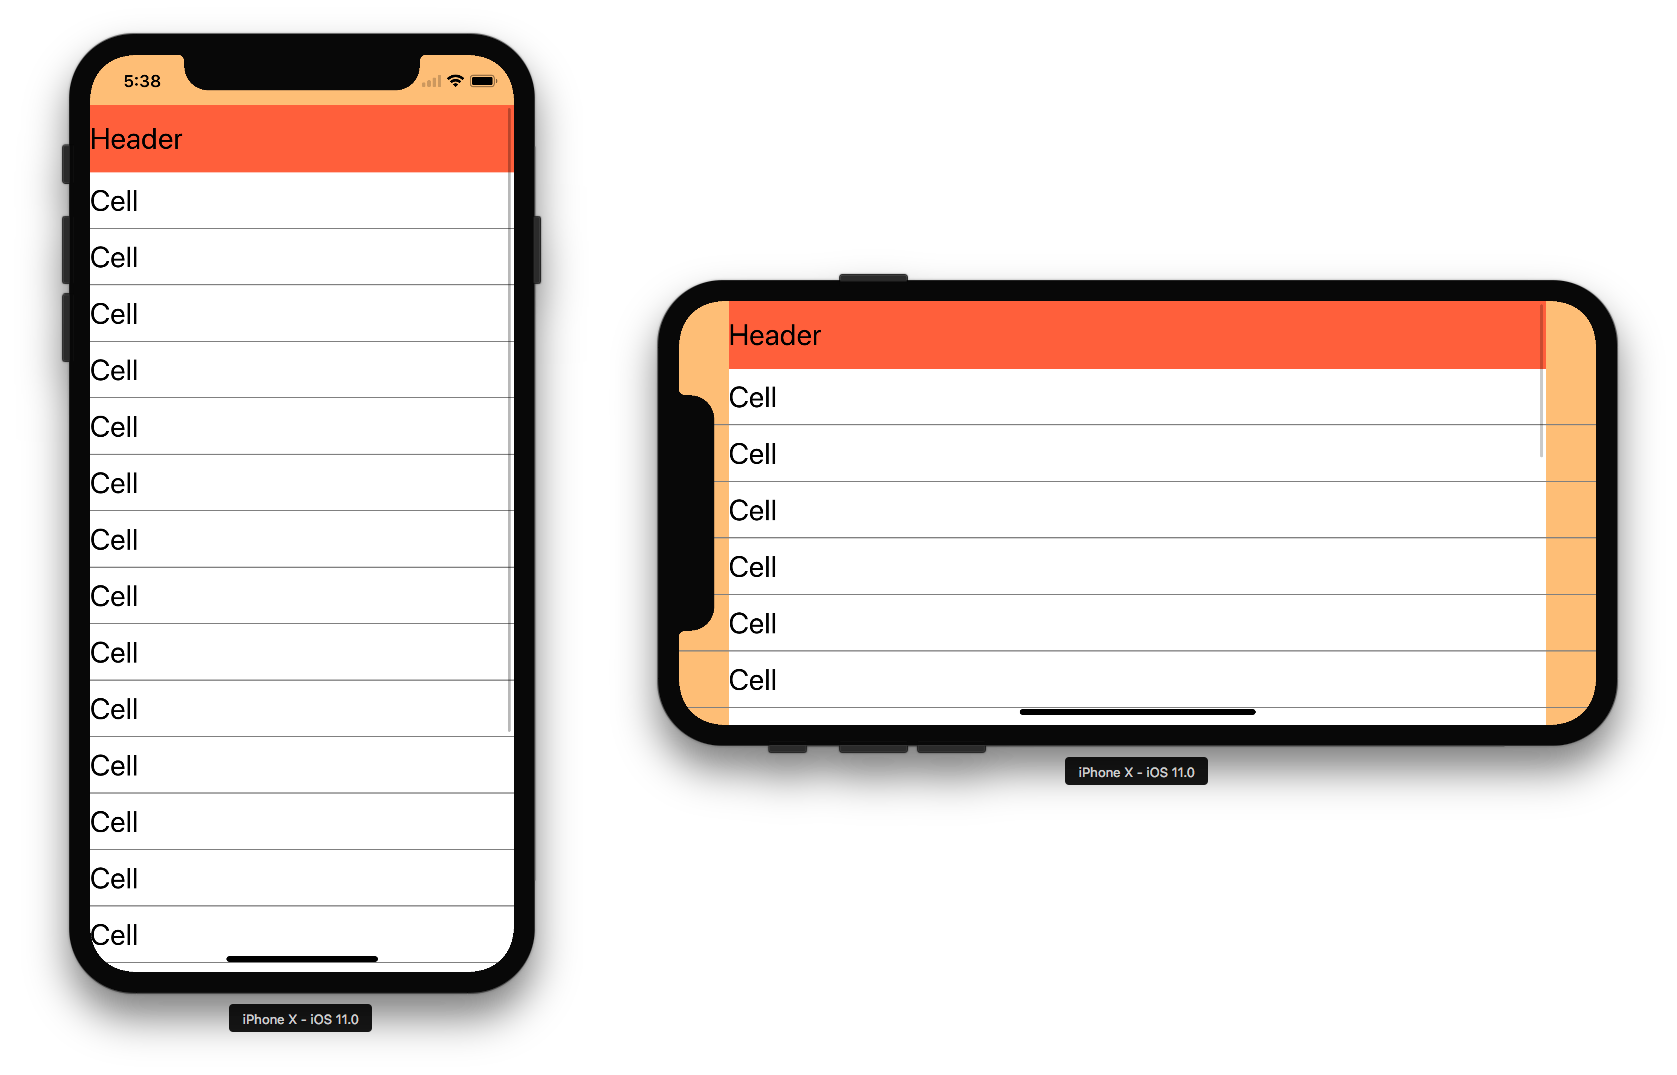
A custom header has a label that is added to the header’s content view. A custom cell has a label that is added to the cell’s content view and a separator that is added to the cell. The header and cells are transparent. A cell’s content view has a white background. A header’s content view has a red background.
You can see that the header’s and the cell’s content view frame is changed in landscape orientation. At the same time the cell and the separator frames aren’t changed. It’s a default behavior which can be managed by the new UITableView’s insetsContentViewsToSafeArea property:
If you disable content view insets:
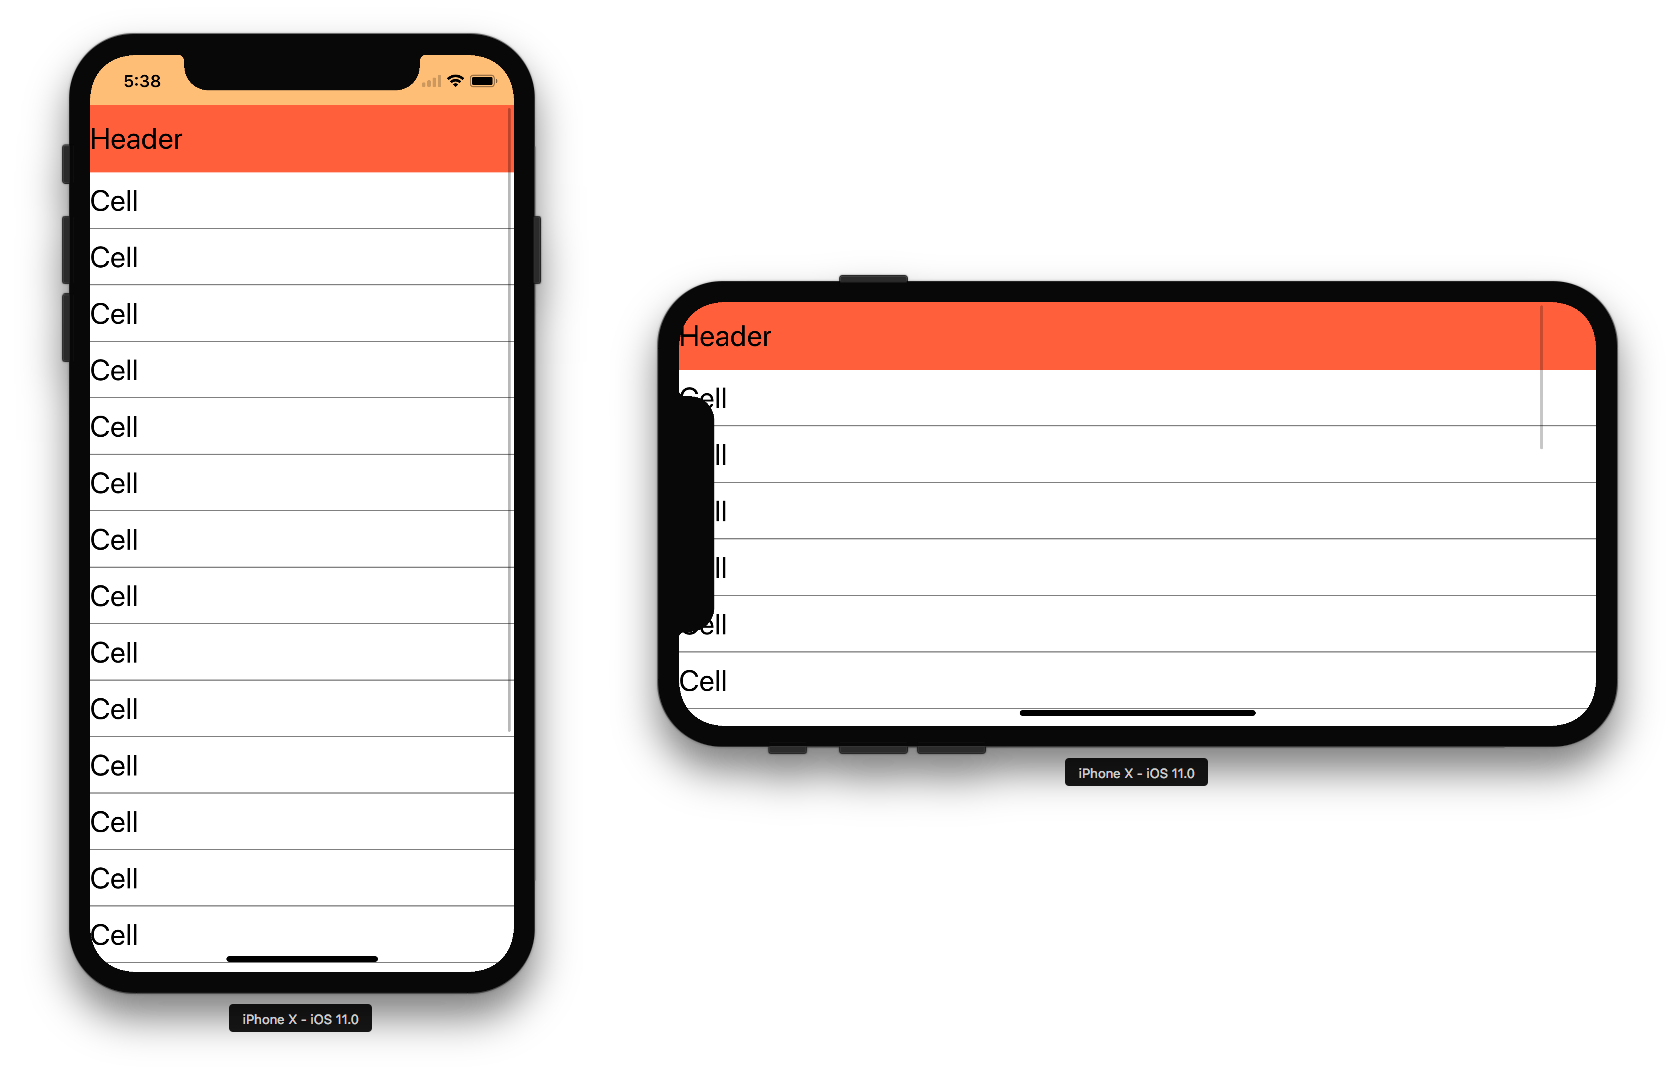
you will see that now the header/footer/cell content views frame is equal to the header/footer/cell frame.
All this means that in iOS 11 you don’t need to change the header/footer/cell subviews positions if they are added to the content view, UITableView will do this work for you 👍.
UICollectionView
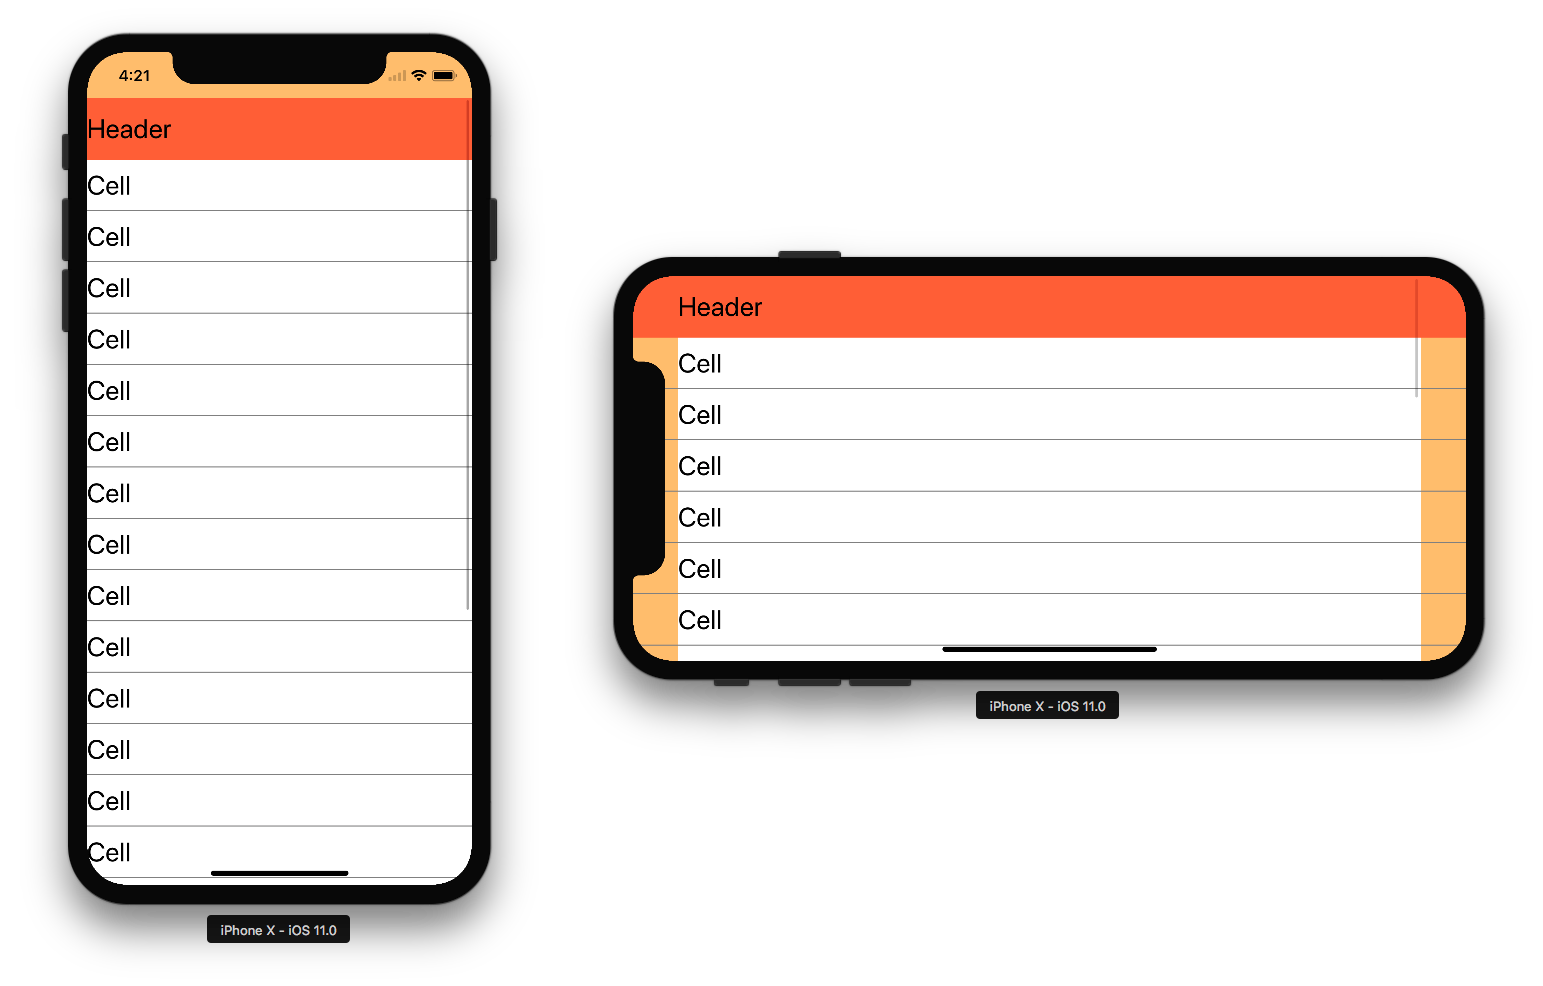
Let’s try to create the same list of items in UICollectionView:

A collection view uses UICollectionViewFlowLayout. Scroll direction is vertical. Cells are transparent but a cell’s content view has a white background. The header aka UICollectionReusableView doesn’t have contentView and has a red background itself.
From the screenshots you can see that the collection view doesn’t inset the header/footer/cell content by default. The only way to layout content correctly is to attach header/footer/cell subviews to the header/footer/cell safe area:
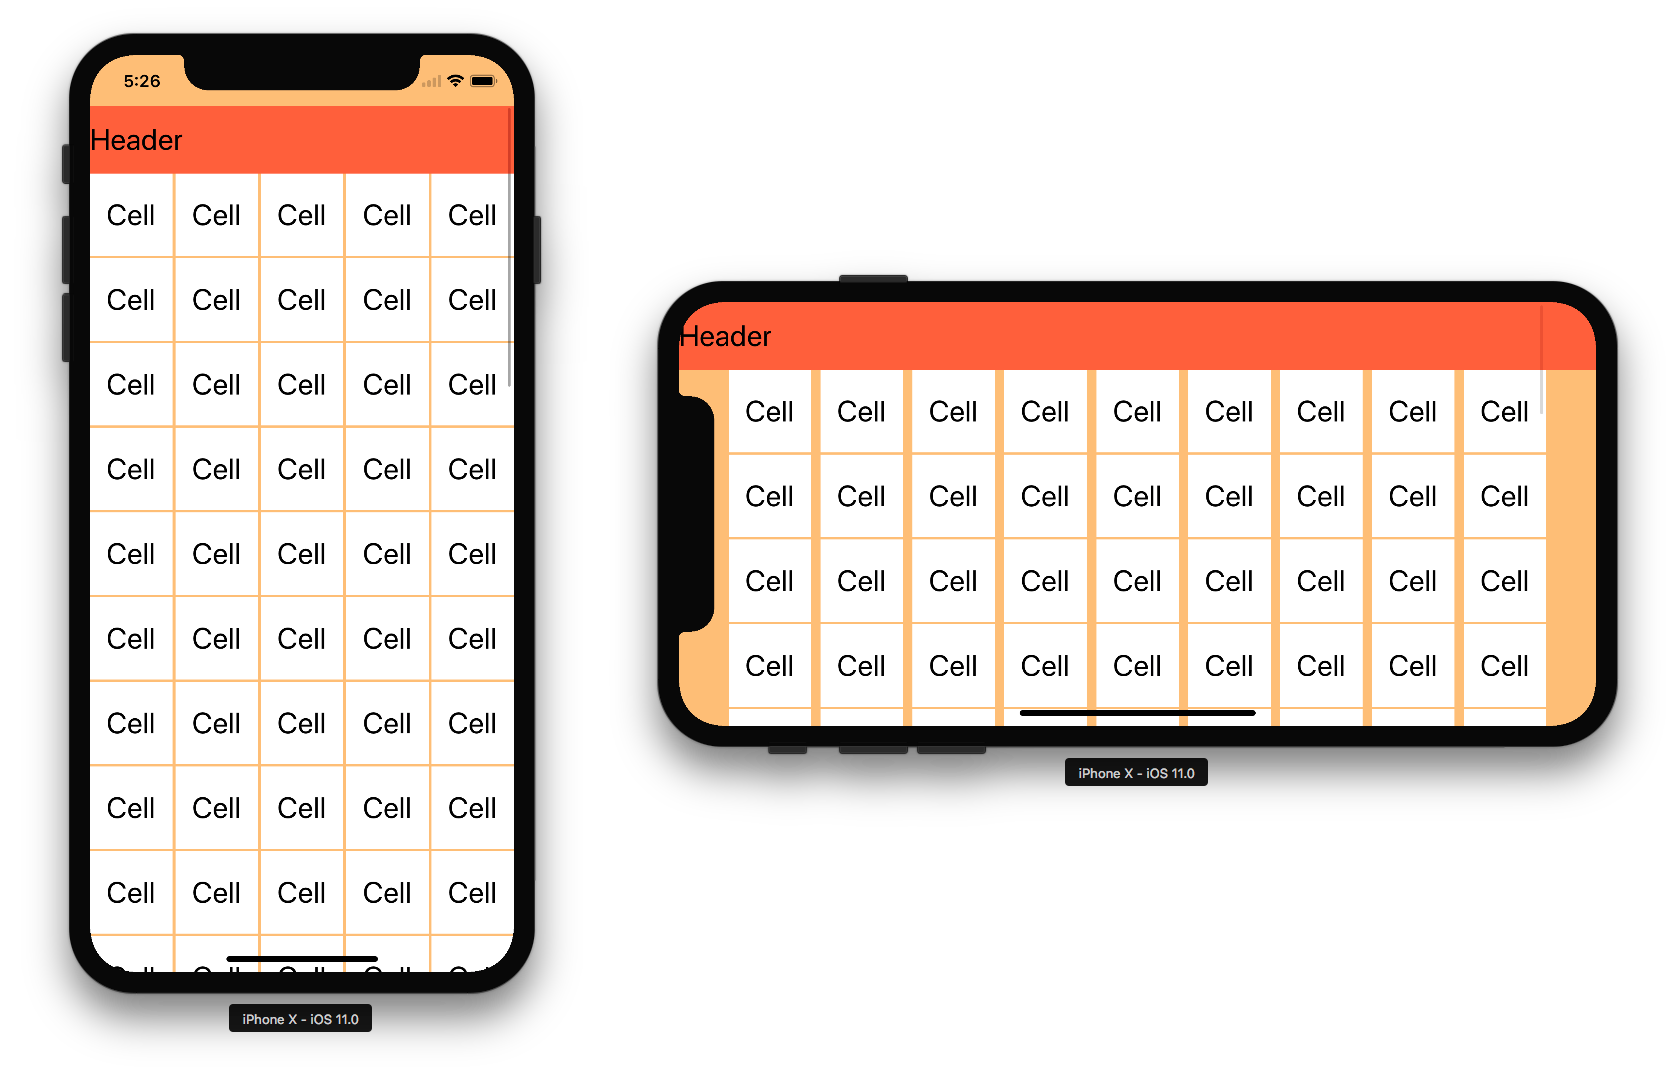
Now let’s change the collection view’s cells size to make a grid:
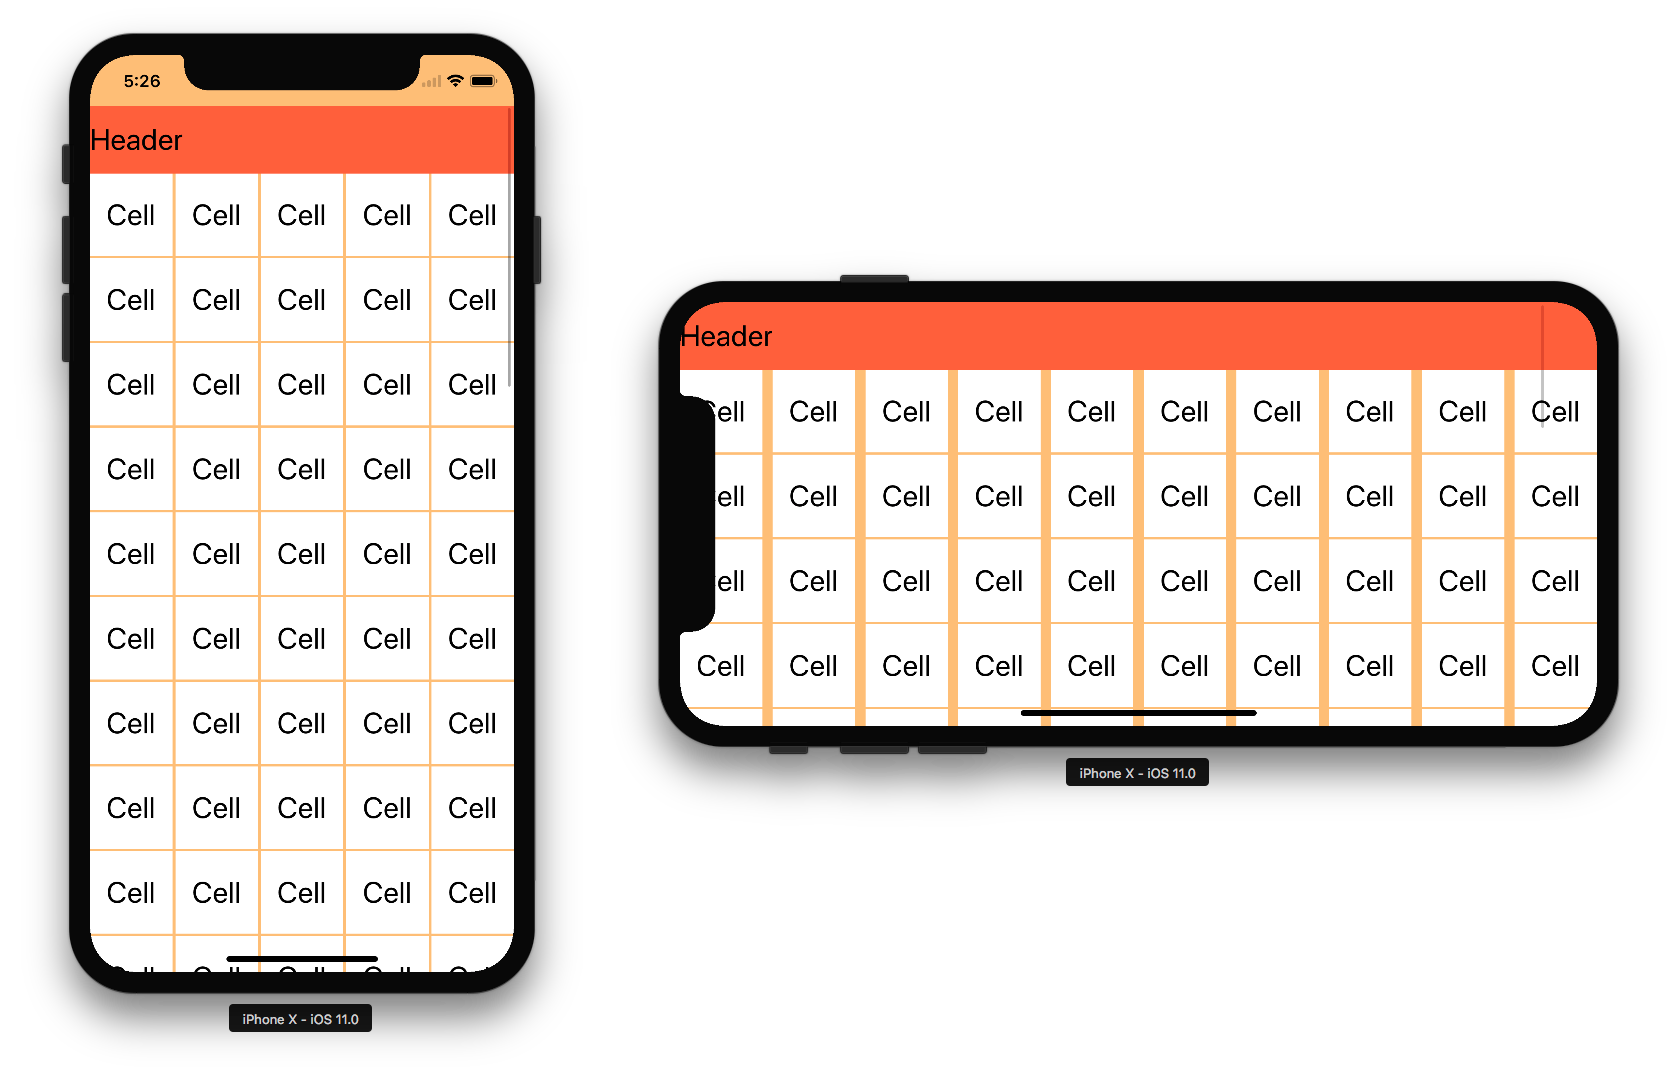
As you can see in landscape orientation the cells are overlapped by the notch. To fix this we can add safe area insets to section content insets but in iOS 11 UICollectionViewFlowLayout has a new sectionInsetReference property which can do this for you:
To produce desired result just set the fromSafeArea value. In this case actual section content insets will be equal to the section content insets plus the safe area insets.
Similarly when the fromLayoutMargins value is used the collection view layout margins are added to the section content insets:

Recap
In iOS 11 Apple has added many useful instruments to work with the safe area. In this article I’ve tried to summarise and describe them all. I hope it can help you to adopt your apps to the safe areas. In addition I suggest that you watch related WWDC videos and read articles:
- Updating Your App for iOS 11
- What’s New in Cocoa Touch
- Building Apps for iPhone X
- Positioning Content Relative to the Safe Area
- Designing for iPhone X
Special links for those who use storyboards (I don’t 😎):
Also you can check the example I’ve created for this article.
Nhận xét
Đăng nhận xét